
This page may contain affiliate links. As an Amazon Affiliate, I earn on qualifying purchases. Please see our disclaimer for more information.
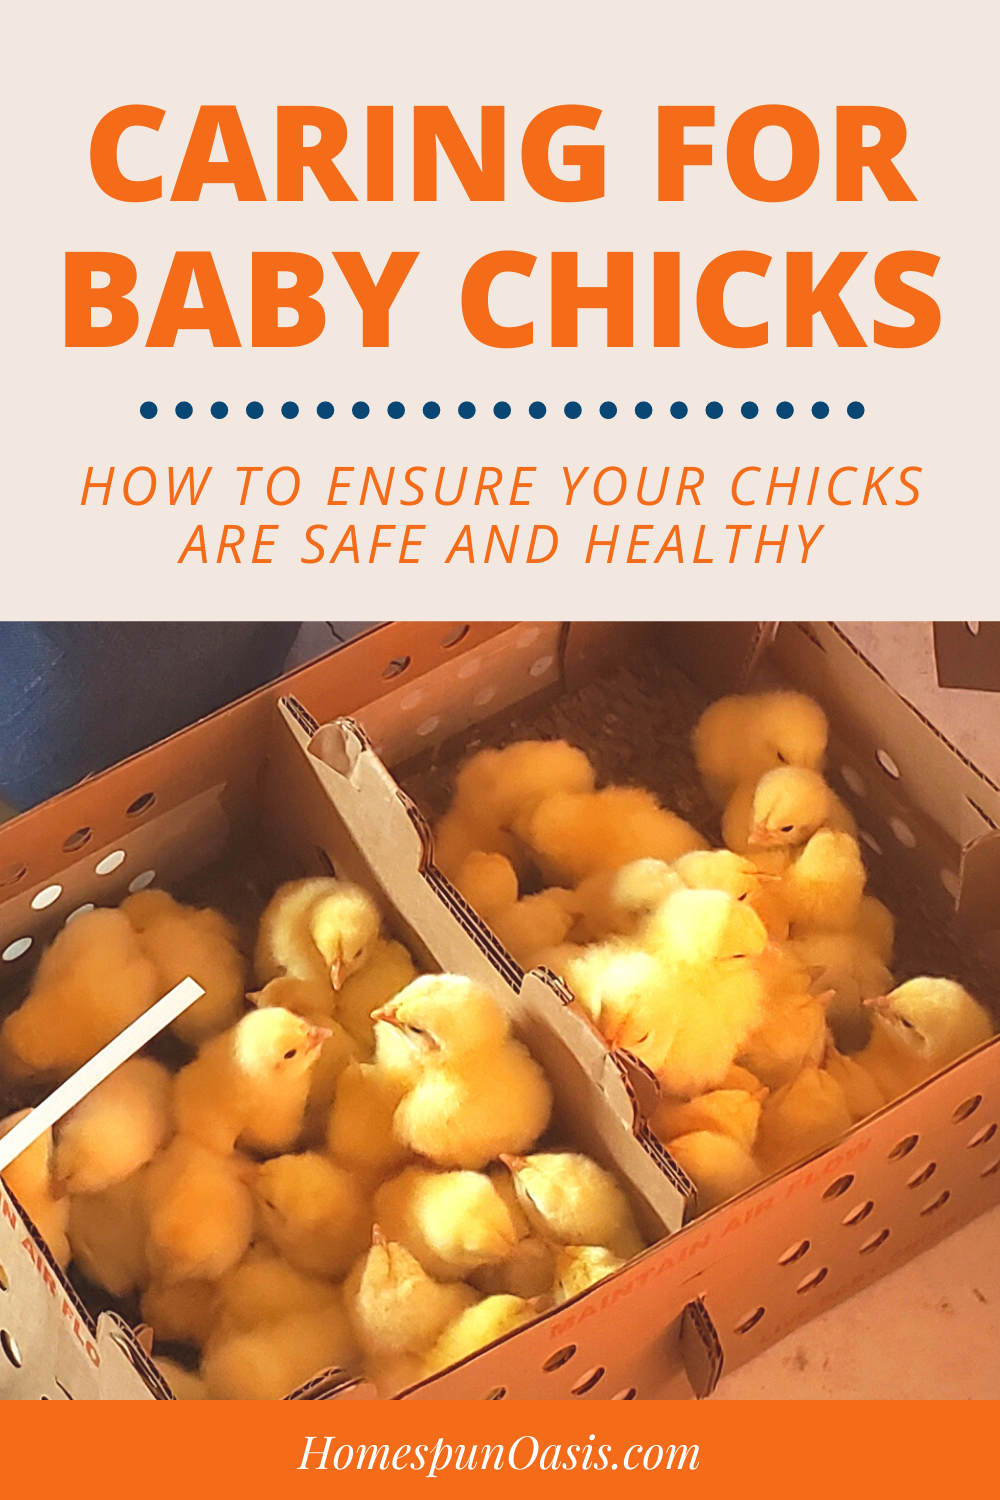
With the calendar declaring spring, we’re greeting babies. Baby chicks, that is. A few days ago, we received two shipments of chicks—a box of fifty Cornish Cross (meat birds) and a second box of thirty assorted layers. Are you new to raising chickens? These tips on preparing and caring for baby chicks will help you get started on this new adventure.
When we first started raising chickens, the idea of caring for baby chicks seemed almost overwhelming! Our first foray into being chicken keepers started with six tiny chickens, all supposedly female, and very needy. As the feed store owner piled item after item into the cart, all stuff we’d “need” to care for baby chicks and raise them to be egg-laying hens, fear took hold. What were we getting ourselves into?
Now after a dozen years of caring for baby chicks, we’ve found ways to simplify the process. In this article, I share my best tips for those early days of caring for your chicks.
Purchasing Chicks
Your foray into caring for baby chicks can begin incubated at home, purchased a few at a time from feed stores or farmers, or ordered in bulk from a hatchery. Over the years, we’ve used each method.
I would not recommend starting with incubating your own eggs. This process requires finding fertilized eggs (these can sometimes be purchased locally or ordered online) and having some sort of incubator. While very rewarding and a great way to develop a specialized flock, this is probably something best left to a future endeavor.
For your first foray into caring for baby chicks, I’d suggest starting with a healthy, reasonable number purchased locally. Most feed stores receive orders of chicks in the spring, and it’s easy to purchase exactly what you’re looking for. You can also check with local farmers or ranchers who may incubate and sell young chicks.
If you don’t have a feed store in your area that sells chicks, you can order from a hatchery and have them shipped to you. One thing to be aware of when ordering via a hatchery: the chicks are shipped by mail (usually USPS) and minimum orders apply.
The hatchery we use has a twenty-five bird minimum for layers and a separate twenty-five bird minimum for Cornish Cross. The two cannot be combined to equal the minimum shipping number. Even accounting for some loss (common with shipping baby chicks) twenty-five may be too many for your first chick-tending adventure. You may wish to consider going in with another family to split the birds up and each do separate brooding, or one can brood and then divide when they are mature.
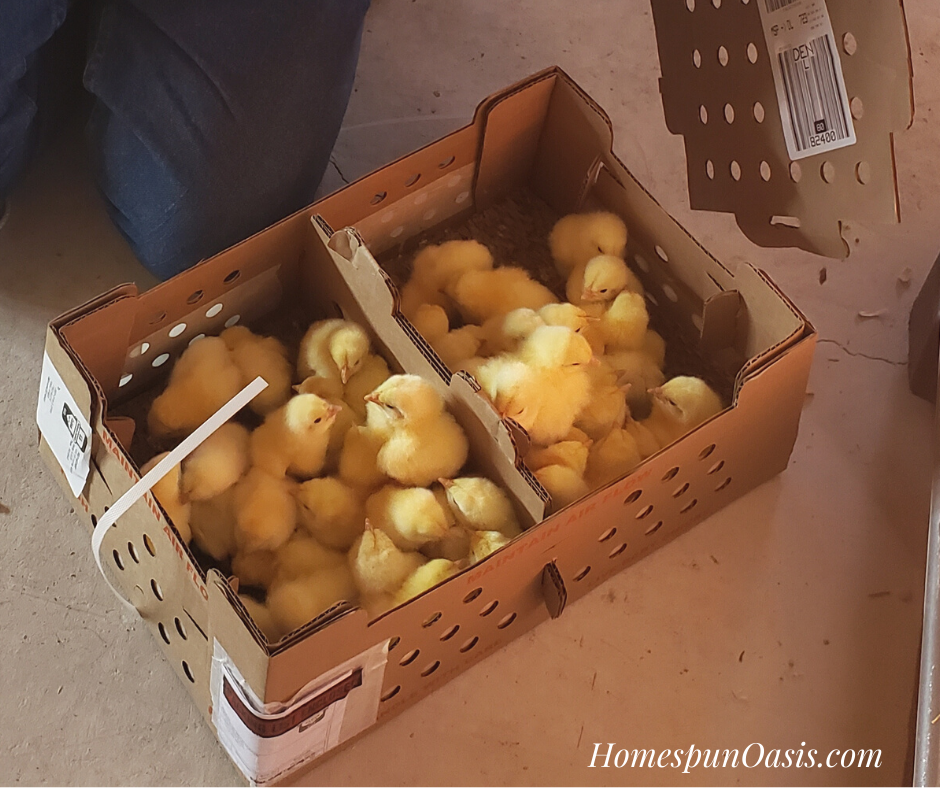
When ordering chicks from a hatchery, they are usually referred to as day-olds. The chicks are hatched and immediately packed (in a box with holes) for shipping. The shipping box varies in size depending on the number of chicks.
With larger orders, there are dividers in the boxes to help prevent them from squishing together. The number of holes in the box varies depending on the season. During cold temps, fewer holes are punched out to help hold in heat. During hot weather, more holes are opened.
Brooding? What’s That?
Brooding is the time from when a baby chick is hatched until they no longer need supplemental heat. The brooding stage can last anywhere from a week to eight weeks, depending on the breed of the bird and the ambient temperature.
If you start caring for baby chicks when the outside temperatures are in the 80s or 90s, they may need only a few days of additional heat. If the temps are low, like my Wyoming nights in early May, brooding will take weeks.
The most common way to provide heat for your brooder is with an electric clamp-on heat lamp. The heat lamp can be clamped to the side of the brooding container. It should be positioned to provide a cozy, warm environment of somewhere around 90 degrees.
Once the chicks are in the brooder house, it’s easy to tell if the lamp is positioned correctly by the chicks’ actions. If they are spread out, trying to escape the heat of the lamp, it’s too warm (too low). If they are huddled together, shivering, it’s too cold (too high). The chicks must be warm or they won’t eat or drink.
As the chicks grow and mature, they need less heat. Raise the light weekly to lower the temperature by about five degrees. Again, you can tell if it’s at the right height by the way the chicks respond.
We currently use a heat lamp for our brooder, but a few years ago, when we were still off-the-grid, our solar system didn’t have enough oomph for a heat lamp. During that time, we kept our chickens warm by using mason jars filled with hot water and made little “houses” out of cardboard boxes to give extra warm spots. It was a lot more labor-intensive but resulted in very hearty and healthy birds. The book Poultry Breeding and Management by James Dryden, copyright 1916, is a wealth of information on brooding and raising chicks without electricity.

Brooder House
The chicks should be kept in a brooder house or container. If you have only a few chicks, you can use a cardboard box or lidded tote (with the lid removed) to house them. Make sure you can hang your heat lamp at the correct level and have room for a small waterer and a feeder.
Remember, cardboard boxes are flammable and get soggy when wet. I would not use a heat lamp with a cardboard box. I might use a regular light to add some heat or stick with hot water bottles. The tote is a safer choice, but you must still be careful with the heat lamp. I’ve heard more than one story of larger chicks jumping and knocking the lamp down with disastrous results.
More chickens require more space. Over the years, we’ve had a variety of different houses. One year, we used a large dog crate lined with cardboard to keep the chicks from squeezing out the bars (and to help hold heat). The last few years, we had a large plastic stock tank. That was a nice size and we were able to brood fifty meat birds comfortably.
This year, we’re using an old 300-gallon water barrel that had a hole in it. It’s the perfect size for our seventy-eight birds at their young stage.
There are many options for brooders. If our meat birds outgrow their water barrel but aren’t yet ready to move fully out of a brooder, we’re considering making a baby gate brooder. We’ll put down a tarp in the garage, put the gate in place, and then add a strip of cardboard around the bottom to keep the chicks from squeezing out and to help hold in warmth.
We do make sure to use brooders without corners. When caring for your baby chicks, you may notice they easily startle. They’ll often all run to a corner, which can trap and smother the young birds. For a square brooder, we add cardboard pieces to the corners to smooth and slightly round them.
I’ve long wanted a larger, Joel Salatin style chicken brooder like the kind described in Pastured Poultry Profits, but we don’t raise enough chicks at one time to justify the time or expense of building something like that (here’s an example of a similar style brooder). As long as the brooder provides a safe, warm environment and is the appropriate size, that’s all that really matters for us.
Whatever you’re using as a brooder house, it should be in place and set up before bringing chicks home. I’ve gotten my shipping weeks wrong before and had chicks arrive a week before my brooder was ready. Believe me, that is a delay you do not want. Having a nice warm spot for your chicks as quickly as possible after shipping will help their overall health.

Caring for Baby Chicks
In addition to a brooder house and warmth, your chicks will need unlimited access to food and water. For water, we use small bases and screw on a quart mason jar or buy the plastic jars that fit the base. The quart size is perfect for young chicks. With a larger waterer, you risk the curious chicks getting in too deep and drowning. If you must use a larger waterer, add pieces of gravel or stones to help prevent accidents.
The chicks do not eat or drink during transport. The nutrients in the yolk are enough to get them through the first few days of their lives. This helps with shipping chicks. That said, there is often some shipping stress. It is common to lose a chick or two during transport and maybe another within the first twenty-four hours. The hatchery knows this and will usually add a couple extra to your order and/or offer a “live chick guarantee.”
If you receive your chicks from a hatchery via mail order, remove them from the box one by one and gently dip their beaks in the water. This introduces them to the water and urges them to drink. Once all your chicks are in the brooder, watch them for a few minutes to make sure they are finding the water and, possibly, the food and to make sure the temperature is to their liking. Then leave them be. I like to go back and check on them an hour or so later. I’ve found, especially with the meat birds, they will be ready for water and food refills around that time.
For serving food, we’ve used a variety of items in the past. From old plastic plates to cake pans to simply having food on a piece of newspaper. This year, we’re using a larger feeder along with a couple of smaller plates scattered about to prevent everyone from piling up.
Your local feed store likely has a plethora of feed options. Make it easy on yourself and ask for help. We usually start with chick starter crumbles, which is 18% protein and (usually) medicated. Amprolium is added to the feed to help prevent coccidiosis, a common intestinal parasite that easily spreads. Amprolium blocks the uptake of thiamine in coccidia, which prevents the disease coccidiosis. In my area, we don’t commonly see nonmedicated starter. We feed the starter for the first few weeks and then begin to mix it with a grower ration.
Pine shavings, which help with the chicks’ comfort and control waste, will get in the food and water. Be prepared to clean regularly. You’ll also want to use a garden trowel or similar type of scooper to remove the soiled shavings and replace them with fresh ones.

Security
Depending on where you are brooding your chickens, you need to be aware of predators. If you are brooding in the house, they need to be kept away from family pets. If using the garage, consider snakes or rats. An outdoor brooder may have other predatory issues, such as skunks. Consider what issues you may have and look for ways to prevent problems.
As your chicks age, they will grow, and many of the issues they faced as day-olds will diminish. When our meat birds are three weeks old, and if the weather is suitable, we move them out of the brooder. In the past, we’ve used chicken tractors to house the meat birds. These tractors are open-bottomed but the tops are covered (for security from flying predators) and can be moved daily to fresh ground.
This year, we’re putting the meat birds in our former goat pens to allow them to clean up the residual hay and till the ground, with a plan for future garden expansion. I’ll update you on how this goes in a future post.


We have 42 chicks coming . Seems like there is a big run on them this year . Probably the bird flu and high cost of eggs. We won’t get ours until August ! Hubby (87 yrs old)and son are building a coop that is attached to back of our garage so it has power for the heat lamp . It’s not our “first rodeo” ? Thanks for all the info.
Hi Sharon!
Chicks are so much fun. <3