
This page may contain affiliate links. As an Amazon Affiliate, I earn on qualifying purchases. Please see our disclaimer for more information.
Would you like to ensure your long term food storage is as fresh in a decade (or two) as it is today? Spending a little time and money today can guarantee those beans, grains, rice, and more are well protected. The secret? An oxygen-free environment.
Each summer, usually in June or early July, we do a pantry and cabinet cleanup and inventory. We go through not only our shelf-stable items but also our long term food storage.
As we’re checking our inventory, we often find the need to place new orders of bulk goods, like beans, grains, or rice. While the cheapest way to purchase these items is usually in bulk packaging, storing them in the same packaging is not the best way to keep them for the long term. Instead, you want to create an oxygen-free environment.
With proper storage—using Mylar bags, oxygen absorbers, and plastic buckets—beans, rice, and grains will last practically forever. We recently opened a 5-gallon bucket of lentils from 2012, stored in Mylar with oxygen absorbers, and they are as fresh as a small bag we purchased a few months ago. Using a vacuum sealer is another great way to preserve some foods for the long term. In this article, I’ll give the basics for both options.
Mylar Bags
If you’ve researched long term food storage, you’ve likely heard of Mylar. It’s the most common “do it yourself” way to prepare items bought in bulk. Sure, you can purchase buckets and cans of already sealed grains, beans, rice, and much more, but usually, the convenience of already sealed items comes at a cost.
For the most part, it’s cheaper to purchase items in bulk packaging, which usually arrives in plastic or paper bags. These bags are fine for short-term storage of a few weeks or maybe a month, but they aren’t suitable for the long term.
By purchasing Mylar bags and oxygen absorbers (they often come together but you can purchase them separately as well) and buckets with lids (or finding them for cheap or free), you can quickly and easily transform those plastic bags into long term food storage solutions.
Okay, great. But…
But…What Exactly Is A Mylar Bag?
Mylar’s a trademark from DuPont for a polyester film made from stretched polyethylene terephthalate (PET). Mylar has high strength, is resistant to extreme temperatures, and provides a barrier to moisture, light, gas, and odors. These characteristics make it very popular for food storage. Mylar is also used in emergency blankets.
Since Mylar is a brand name, you may find food storage bags that look like Mylar but go by a different name, such as Metalized Storage Bag or Dry Pack Pouch. This is fine, as long as what you have sourced is food grade.
Mylar (and the other brands) are available in a variety of thicknesses. When shopping for long term food storage bags, you want a minimum thickness of 3mm. If I know I’m going to store something with potentially sharp edges, such as pasta, I would look for a higher thickness of around 6mm or use an alternate storage method, such as a vacuum sealer.
These bags are available in a variety of sizes and are great for storing small items in metalized pouches to large 5-gallon sizes. For most of our food storage, we use the 5-gallon ones, but the 1-gallon is also useful. Small bags are also wonderful to use for things like spices or individual packages of nuts or seeds for bug-out bags, get-home bags, and so forth.
Going hand in hand with the Mylar bags are oxygen absorbers.
What Are Oxygen Absorbers?
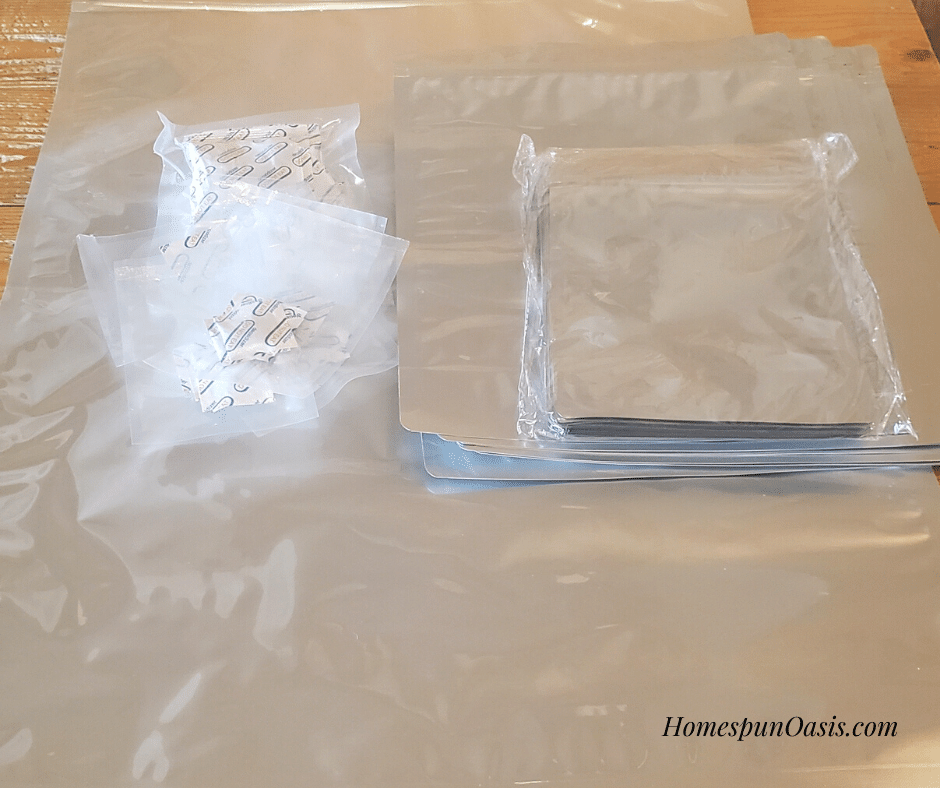
Oxygen absorbers are little packets designed to remove oxygen from a sealed environment. They help maintain food quality, protect from insects, and extend shelf life for long term food storage.
The oxygen absorber packets are made from a porous material and filled with an iron powder that becomes iron oxide in the presence of oxygen. The way the packets are made allows the oxygen and moisture to enter, but the iron powder doesn’t leak out, making it safe to use for food.
When you purchase oxygen absorbers, they’ll arrive sealed. Most oxygen absorbers include a color indicator to show if the absorber is still good and ready to use. Once you open the container, they begin to work immediately and you may notice they become warm to the touch.
After you open your package of absorbers, you’ll want to move quickly to get all of them either added to the food package or put in a small glass mason jar sealed with a flat and a lid. After a few minutes or so, you may hear the jar pop as the oxygen is sucked out and the lid seals.
Once the oxygen has been removed, the chemical reaction stops. We have many Mylar bags that had oxygen absorbers added a decade or more ago and the bags are still tight and lack oxygen. That’s what you want!
It’s important to choose the right size of oxygen absorber for the size of Mylar bag. When buying bags and oxygen absorbers as a package deal, they’ll usually come in the correct size. One-gallon bags need 300-600cc absorbers, and 5-gallon bags need 2000-3000cc absorbers.
What Foods To Use Oxygen Absorbers With
Also important is to know which foods to packaged in Mylar bags with oxygen absorbers and which foods not to. You should only use oxygen absorbers with dry foods, such as wheat kernels, beans, corn, barley, etc. Anything with a moisture level over 10% is not safe to use with an oxygen absorber. You wouldn’t use oxygen absorbers for powdered foods, like salt, baking soda, or sugar. This could cause a chemical reason and/or turn the powder into a brick.
Some sources don’t recommend using oxygen absorbers with brown rice or nuts because they have a high oil content and aren’t suitable for long term food storage. True…but I still package both of these items, knowing I won’t get 20 years out of them but may get three, four, or five. Be sure to use FIFO for these types of items.
Some people may try to substitute Diatomaceous Earth and/or bay leaves for oxygen absorbers. While both of these are known to help with pests, they don’t remove the oxygen. For long term food storage of 10, 20, or 30 years, you will want to use the oxygen absorbers.

How To Package Long-Term Food Storage Using Mylar
Gather Your supplies
- Buckets with lids (1-gallon, 3-gallon, or 5-gallon)
- Mylar bags (in sizes to match the buckets, or use several smaller bags in one large bucket)
- Oxygen absorbers
- A clothing iron and a piece of 2×4 or a flat board, OR a hair straightener
- A friend
This job is possible to do on your own, but it goes much easier with a friend, especially when hefting 25 or 50-pound bags. You can purchase food-grade buckets, or you may be able to find them for cheap or free at a bakery. When we first started packaging our own long term food storage, it was easy to get buckets of $1 or less each. Now it’s more challenging! But it’s still worth asking around locally.
Another thing I like to have to go with my buckets is a bucket opener tool. This makes popping the lids off so much easier! You could also consider gamma lids. These can make opening the buckets much easier, but for the cost, I’ll stick with my less than $4 opener.
Get Everything Set Up
I like to set everything up before opening any bags, especially oxygen absorbers.
- Line up or stack the food items you’re packaging
- Line up your buckets and have the lids nearby
- If using a Mylar bag the same size as the bucket, line the bucket with the bag. If using smaller bags, with a plan to store several in a bucket, lay them out so they are ready.
- Heat up your iron or hair straightener
- Have a knife or scissors ready (to open packages)
- Have a mason jar with a flat and lid ready for the unused oxygen absorbers, or plan on resealing the packaging with your iron/hair straightener
- Take a look around…is everything ready?
- If you have everything, let’s go!
Now Fill Your Bags
One person holds the bag and/or bucket while the other person pours. Make sure you leave headroom at the top. The contents should end a few inches below the top of the bucket. Shake down the contents and add more if needed. Label the bag with the contents.
Once all your containers are filled, you can open the oxygen absorbers. Take out only the amount you need. I like to buy smaller oxygen absorber packages that have five inside so I’m only working with five at a time. This number feels manageable to me. Any additional oxygen absorbers that you aren’t using immediately need to be put in the mason jar and sealed, or reseal the packaging using the iron/hair straightener.
Working quickly, same as the oxygen absorbers are doing, you want to get everything sealed. Manually push on the bag to remove as much air as possible.
If using an iron and board, lay the board on one side of the bag and the iron on the other, at the top of the bag. (Here’s where you need your friend again.) Start in the center to make a seal, then seal one end and then the other. With the open spaces still available, push down on the bag again to remove more air before sealing the entire top.
If you’re using a hair straightener, use the same process of starting at the center and then sealing both ends, removing more air before finishing the seal.

What To Do After The Bags Are Sealed
Once sealed, tuck the bag into the bucket and check for a tight seal to ensure no air is escaping. If there’s air, check your seal and fix the problem. Once all is good, push all the Mylar down into the bucket and put the lid on.
I then add a piece of masking top to the top and a second piece on the side, large enough to write the bucket contents and date on. You may also wish to add how many pounds are in the bucket. My process for smaller Mylar packages or vacuum-sealed ones is much the same. I label the container they’re stored in (usually a 5-gallon bucket) with the contents and date. I note how many packages there are and the approximate package size.
Once it’s labeled in both places, double-check that the lid is on tight and then set it aside.
The oxygen absorbers take up to four hours to fully absorb all the oxygen. I like to check the bucket after that to make sure everything is tightly sealed. If I have any doubt, I’ll unseal and try again. If it’s good, I move them to a staging area and check in a week. If all is well, it’s then moved to my long term food storage area.
When all the bags/buckets are sealed, pour yourself a cup of tea and put your feet up! Take this opportunity to add your buckets to your spreadsheet, too, if this is part of your process.
How to Package Long Term Food Storage Using a Vacuum Sealer
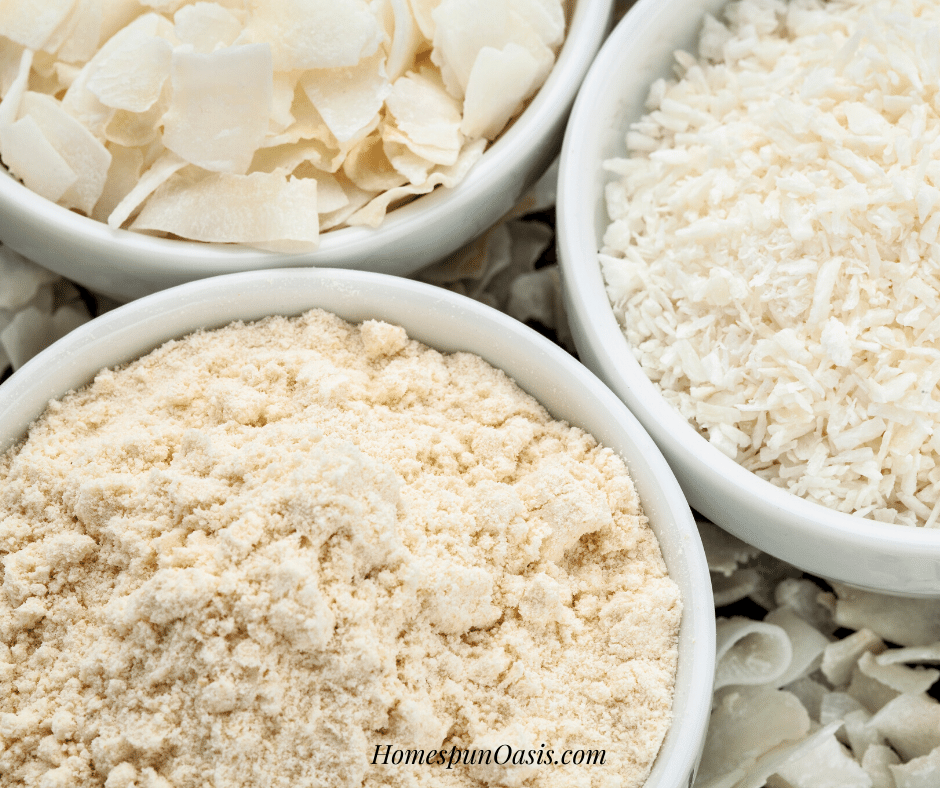
For some items, such as high-moisture things like almond or coconut flour, I use a vacuum sealer instead of Mylar and oxygen absorbers. While I do buy some vacuum seal bags, I prefer the rolls so I can make my own size of bags. These come in so handy for small items like spices or larger items like spaghetti. Note: consider exactly what you are vacuum sealing. Sharp objects can poke a hole in the bag. I’ve had good results with things like spaghetti and coconut flakes but not everyone does. For these questionable items, you may wish to stick with the stronger, thicker mylar.
There are many varieties of vacuum sealers. You’ll want to follow the instructions included with your device. If you’re shopping for a vacuum sealer, look for one that has an optional jar attachment port. These allow you to suck the air out of a jar and are wonderful for things like home-dehydrated fruits and vegetables. I like to keep a large supply of mason jars on hand, so it makes sense to keep them filled instead of storing them empty, especially when working with limited storage space.
Maintenance of Your Long Term Food Storage
I check all my Mylar bags one time per year, when we do our pantry cleaning and organization, to ensure the seals are still tight and all is well. I don’t open the Mylar packaging until I’m ready to use the contents. If I do use the contents, I’ll just take out a portion (enough to fill a gallon-size glass jar) and then reseal the Mylar. When resealing, you must add new oxygen absorbers.
Recordkeeping
Part of my plan also includes keeping a spreadsheet and updating it as needed (when things are used or more product is added). At the annual pantry cleaning, the spreadsheet is also checked for accuracy. Because I don’t have one area with enough space for all of my pantry and long term food storage, I also note on the spreadsheet where things are located. It’s a good system and is very helpful when I’m looking for that bucket of lentils that needs opened next.


Wow, this article is seriously informative! As someone who loves to stock up on food for emergencies, I never really knew how to properly package items for long term storage. I appreciate the tips on using oxygen absorbers and mylar bags – I may have to invest in those for my next shopping trip. And the reminder to rotate my stock is a good one, otherwise I’ll just end up with a bunch of expired food that serves me no good in an emergency. Thanks for the helpful advice!
Hi Amelia,
So glad it’s helpful. Thanks for your kind note.
Millie
It would be nice to be able to download and electronic version of How to Package Food for Long Term Storage.
Hi Cindy,
This is an excellent suggestion! Let me see what I can do. Thank you.
Millie